Address
Busubait Fiberglass Factory
P.O Box 63113, Dammam 31516
Kingdom of Saudi Arabia
Work Hours
Monday to Friday: 7AM - 7PM
Weekend: 10AM - 5PM
Address
Busubait Fiberglass Factory
P.O Box 63113, Dammam 31516
Kingdom of Saudi Arabia
Work Hours
Monday to Friday: 7AM - 7PM
Weekend: 10AM - 5PM

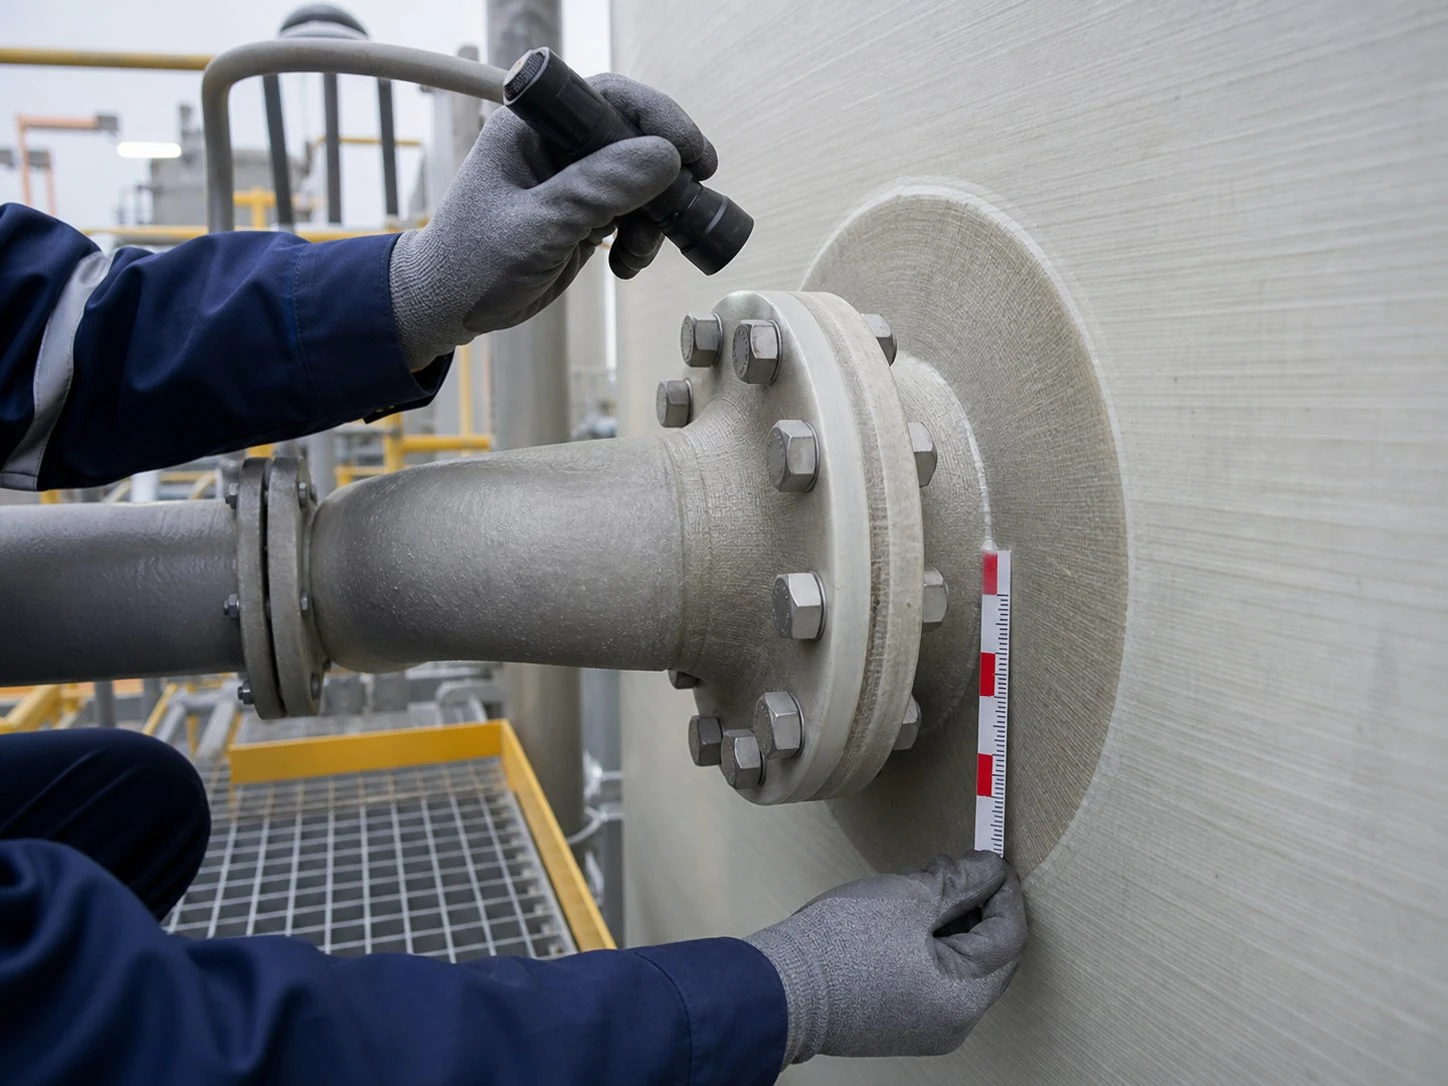
Regular inspection helps identify cracks, leakage, support problems, and chemical damage before they become larger failures. This guide explains what to check and how FRP repairs should be planned.
FRP tanks and pipes are often selected because they resist corrosion in chemical, water, wastewater, and industrial services. However, corrosion resistance does not mean that the equipment can be installed and forgotten.
Mechanical loads, chemical changes, poor supports, heat, sunlight, impact, vibration, and ageing can all affect an FRP system. This guide explains how to inspect FRP tanks and pipes, plan preventive maintenance, recognise warning signs, and decide when specialist repair is required. Readers exploring typical equipment uses can also review common FRP storage tank applications.
Important safety note: This article provides general inspection and maintenance guidance. Tank entry, structural assessment, pressure testing, laminate removal, and FRP repair should be planned and completed by competent personnel under the applicable site procedures, design requirements, and regulations.
An FRP component normally contains several layers. The inner surface may provide chemical resistance, while the structural laminate carries mechanical loads. Damage does not always begin as an obvious leak: a surface crack, stressed nozzle, loose support, or deteriorated internal barrier may develop gradually.
Identify visible changes before they spread, compare condition with previous records, and detect leakage around joints, fittings, and nozzles.
Check whether supports, connected piping, valves, mixers, or equipment are placing unintended loads on the laminate.
Schedule repairs during a controlled shutdown and review any change in chemical, temperature, pressure, or flow before it becomes a larger risk.
A useful programme therefore looks beyond the laminate surface to operating history, installation conditions, connected equipment, and previous repairs. For wider material context, see why FRP tanks for chemical storage can outperform traditional alternatives.
Good inspection work starts before anyone examines the surface. First understand what the equipment was designed to handle.
Collect drawings, datasheets, manufacturing records, resin information, operating limits, and previous reports.
A repair material suitable for one chemical or temperature may not suit another.
Internal inspection may involve confined-space, chemical, engulfment, electrical, mechanical, and atmospheric hazards. Follow the approved isolation and entry procedures.
Never enter a tank simply because it appears empty.
Use a drawing or numbered grid so every observation can be found again. Record each defect’s position, size, shape, colour, and direction.
Photographs should include a scale and location reference. Where practical, repeat future photographs from the same position.
A tank inspection should cover the shell, roof, bottom, nozzles, attachments, supports, and internal corrosion-resistant surface.
Inspect under suitable lighting and from more than one direction. Look for cracks, crazing, cuts, impacts, gouges, bulging, flattening, buckling, blisters, darkening, chalking, discolouration, overheating, exposed fibres, cracked resin-rich areas, wet patches, deposits, staining, odour, damage at attachments, and changes around previous repairs.
Weathering is not automatically structural failure, but exposed reinforcement, deep cracking, soft areas, or deformation need closer assessment.
Check for radial or circular cracks, deposits, movement, unsupported valves or pipework, misalignment, forced bolt-up, gasket damage, uneven bolt loading, bulging, whitening, separation, and cracks around gussets or reinforcement pads. Tightening bolts is not a universal leak solution; excessive or uneven torque adds stress.
Look for gaps, foundation cracking or settlement, standing water, residue or debris, damaged anchors or saddles, steelwork corrosion or movement, abrasion, and evidence of tank shift. On horizontal tanks examine saddles and nearby laminate; on vertical tanks focus on the bottom knuckle and shell-to-base area.
Where safe entry is authorised, inspect for blisters, bubbles, pinholes, pitting, erosion, soft or sticky areas, brittleness, cracks, exposed reinforcement, peeling, separation, discolouration, deposits, and wear at the liquid line, inlets, outlets, agitators, and drains. See FRP chemical storage tanks for related equipment context.
A qualified specialist may use tap testing, Barcol hardness, ultrasound or other composite assessment, acoustic emission, controlled sampling, or approved load, leak, vacuum, or pressure testing. ASTM maintains a practice for acoustic-emission examination of FRP tanks and vessels. No single method is universal; it must suit the laminate, defect, access, and engineering question.
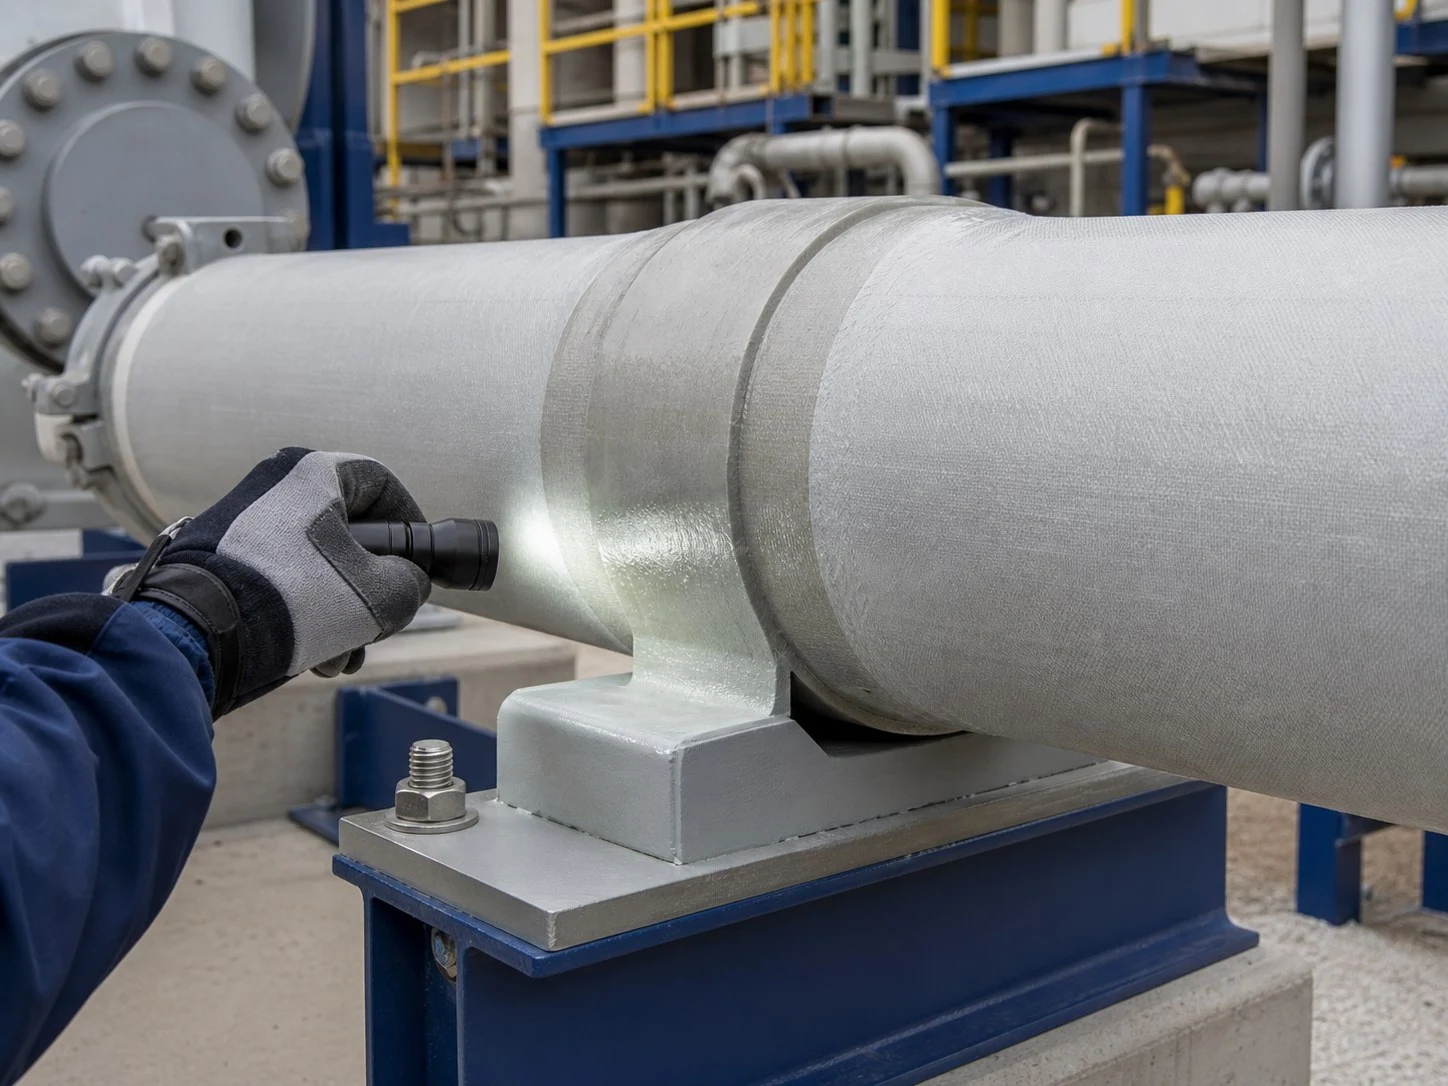
Follow the line from end to end, including straight sections, joints, fittings, supports, anchors, valves, and equipment connections. Busubait’s FRP pipes and fittings page provides related product information.
Look for longitudinal, circumferential, or branching cracks; impact, cuts, abrasion, exposed fibres; bulging, flattening, sagging, or movement; discolouration, texture change, blisters, delamination, deposits, dampness, sharp-edge or hot-surface contact, and outdoor UV deterioration. Focus on areas near walkways, vehicles, lifting, and temporary work.
Inspect butt-wrap and bonded joints for cracks, voids, lifting edges, or leakage; flanges for alignment and gasket compression; elbows, tees, reducers, and branches for movement or deformation; equipment connections for nozzle strain; and earlier field repairs for separation. Do not grind, rewrap, or seal a leaking pressure joint until the cause and extent are understood.
Confirm supports are in the intended locations, the pipe sits evenly, surfaces are smooth and wide, clamps do not crush or cut, guides allow thermal movement, anchors are secure, the line has not sagged, metal does not rub the laminate, and expansion joints remain correctly positioned. A displaced support may matter more than a minor mark because it keeps loading the pipe.
Where safe, observe normal operation. Movement may come from pumps or fans, rapid valve operation, pulsating flow, unsupported valves, misaligned equipment, water hammer, thermal movement, or temporary hoses and scaffolding. Correct the cause instead of repeatedly patching the laminate.
Different defects can look similar from the surface. These descriptions are an initial guide only. Field lists also identify delamination, deformation, damaged fittings, stressed nozzles, worn bottoms, chemical attack, and failed repairs as warning signs.
| Observation | What it may indicate | Recommended response |
|---|---|---|
| Fine surface crazing | Weathering, resin shrinkage, or local surface stress | Monitor and record Record and compare; assess depth and spread. |
| Distinct crack | Impact, excessive load, movement, or laminate failure | Isolate if affected Isolate when containment may be affected and obtain specialist assessment. |
| Blister | Fluid ingress, chemical attack, poor bond, or local manufacturing issue | Investigate Mark the boundary and investigate the affected layers. |
| Soft or sticky area | Resin deterioration, chemical incompatibility, or incomplete cure | Avoid loading Avoid loading the area and arrange material assessment. |
| White or cloudy patch | Stress whitening, microcracking, or local separation | Inspect further Compare with surrounding laminate and inspect for movement. |
| Exposed fibres | Loss of protective resin surface or deeper abrasion | Protect and assess Protect the area from further exposure and assess repair depth. |
| Bulging or distortion | Internal load, vacuum, heat, support failure, or structural weakness | Remove from service Remove from service when the shape is changing or stability is uncertain. |
| Leakage or staining | Loss of containment at laminate, joint, gasket, or nozzle | Isolate safely Isolate safely and determine the leak path. |
| Cracked previous repair | Remaining movement, poor preparation, wrong material, or incomplete damage removal | Reassess cause Reassess the original cause before repairing again. |
No single interval suits every asset. A water tank, concentrated chemical tank, buried pipe, and vibrating line do not carry the same risk.
Use consequence, chemical compatibility, temperature, pressure, age, exposure, history, vibration, manufacturer requirements, and applicable standards.
Use operator walk-arounds, detailed external checks, shutdown internal inspections, event-based checks, and specialist assessment when trends appear.
Use resin-compatible cleaning. Avoid unapproved solvents, heat, pressure washing, or sharp scrapers. Clear bases, drains, and racks so leaks stay visible.
Support heavy items, maintain guides and anchors, prevent rubbing and impact, check alignment, and investigate vibration. Never use FRP lines to support hoses, cables, tools, or scaffolding.
Reassess changes to chemical, concentration, temperature, pressure, vacuum, flow, solids, cleaning, cycles, or agitation. Keep clear trend records.
Trend information is often more useful than one isolated photograph.
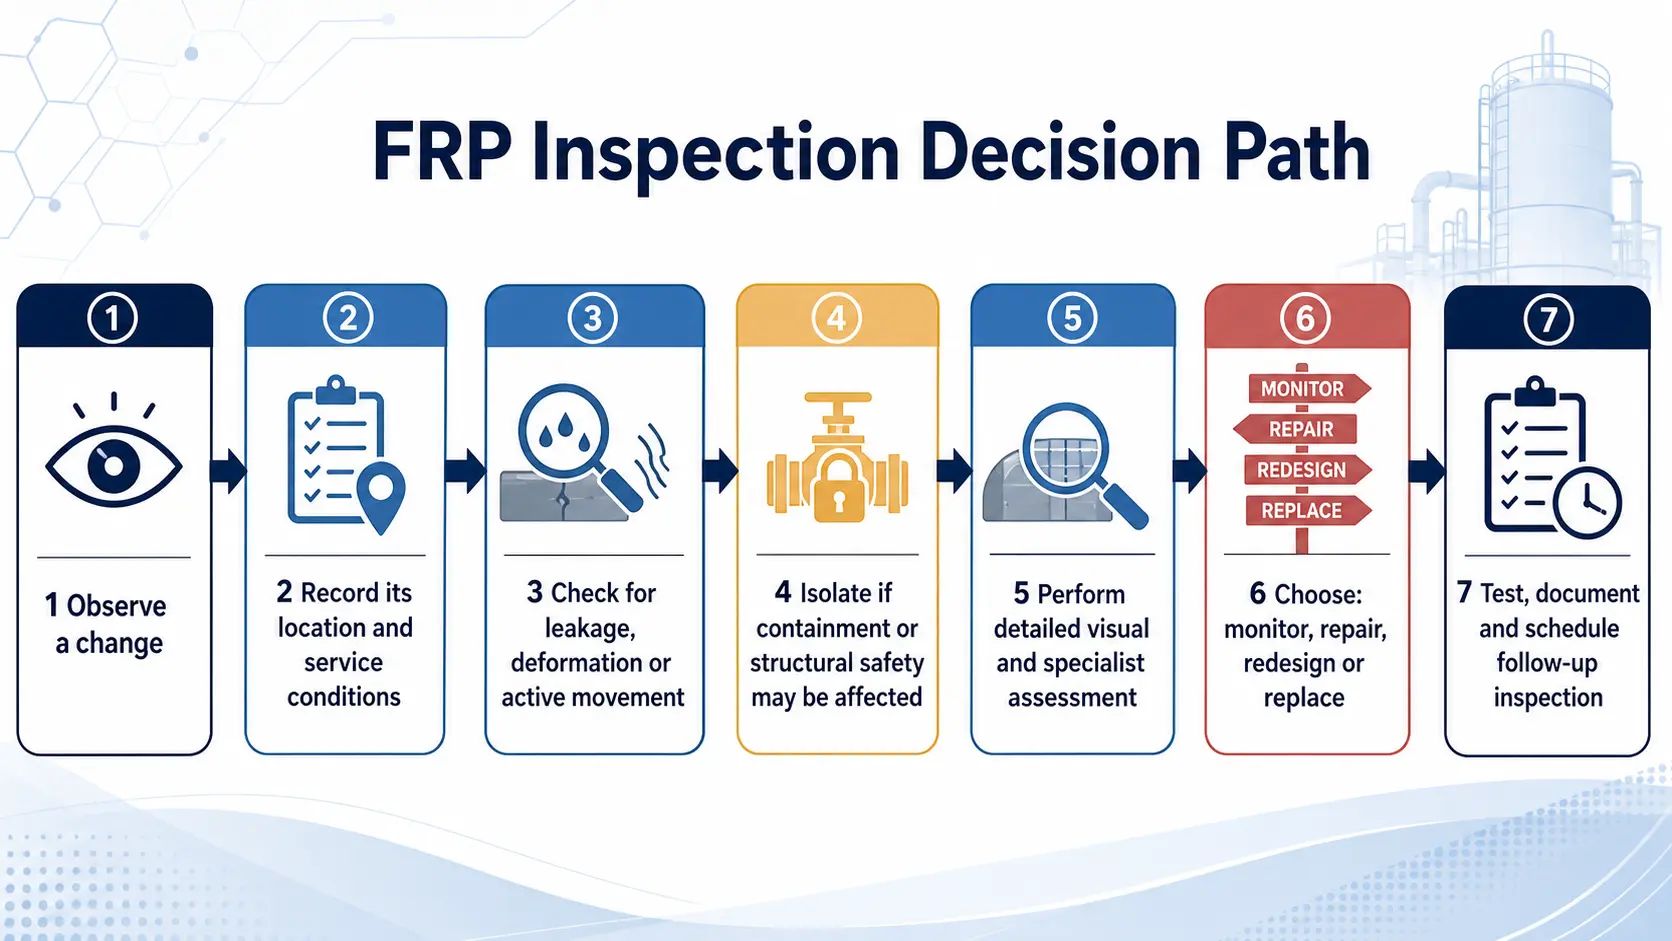
Many local defects can be repaired, but repairability depends on the cause, location, depth, service, and structural condition. Microcracking may extend through the laminate, so do not apply a visible patch before understanding the full area.
Use when the finding is stable, understood, and does not presently affect containment or structural function. Mark, photograph, compare, and set the next review.
Required for unknown depth, widespread blistering or softening, deformation, hidden damage, pressure or vacuum service, major discontinuities, repeated repairs, unknown exposure, or uncertainty about remaining laminate.
Practical when access is complete, boundaries and service are known, sound laminate remains, compatible materials and controlled curing are available, the cause can be corrected, testing is possible, and the owner and engineer approve.
Consider when deterioration is widespread, integrity is lost, service is incompatible, earlier repairs fail, access prevents reliability, process needs changed, costs approach replacement, or continued operation has unacceptable consequences.
The decision should include downtime, access, testing, future inspection, and the consequence of another failure—not only immediate repair cost. For larger equipment responsibilities, see FRP process vessels.
FRP repair is not simply placing fiberglass over a crack. It must restore the required corrosion resistance and structural function.
Remove the asset from service and follow approved isolation, cleaning, ventilation, and work permits. Previous contents matter because residues affect safety, bonding, and cure.
Map the visible defect and inspect beyond its edges for cracked, contaminated, softened, or delaminated material.
Define removal depth, resin, reinforcement, surface preparation, taper, layer number and orientation, corrosion barrier, temperature, humidity, cure, hold points, acceptance criteria, and testing. Account for the original design and actual service.
Use controlled methods until sound laminate is reached. Uncontrolled grinding can enlarge damage, reduce thickness, contaminate the surface, and create unsafe dust; use extraction and suitable PPE.
Use controlled abrasion, edge tapering, dust removal, and protection from moisture or contamination under the approved procedure.
Match the substrate, chemical, temperature, structural load, corrosion barrier, and curing conditions. Do not substitute an available resin without compatibility confirmation.
Control resin ratio, mixing, temperature, humidity, working time, and cure. A hard-feeling surface alone does not justify return to service.
Verification may include visual and dimensional checks, surface and hardness checks, void or bond examination, leak testing, approved hydrostatic, vacuum, or pressure testing, and specialist NDE. Test conditions and acceptance criteria must follow an approved plan.
Record materials, batches, dimensions, curing conditions, photographs, inspection, tests, and approvals, then set a follow-up inspection.
Several common actions can turn a manageable defect into a larger problem.
Clear information helps the specialist assess the problem accurately.
Relevant commercial context can also be supported by Busubait industrial projects.
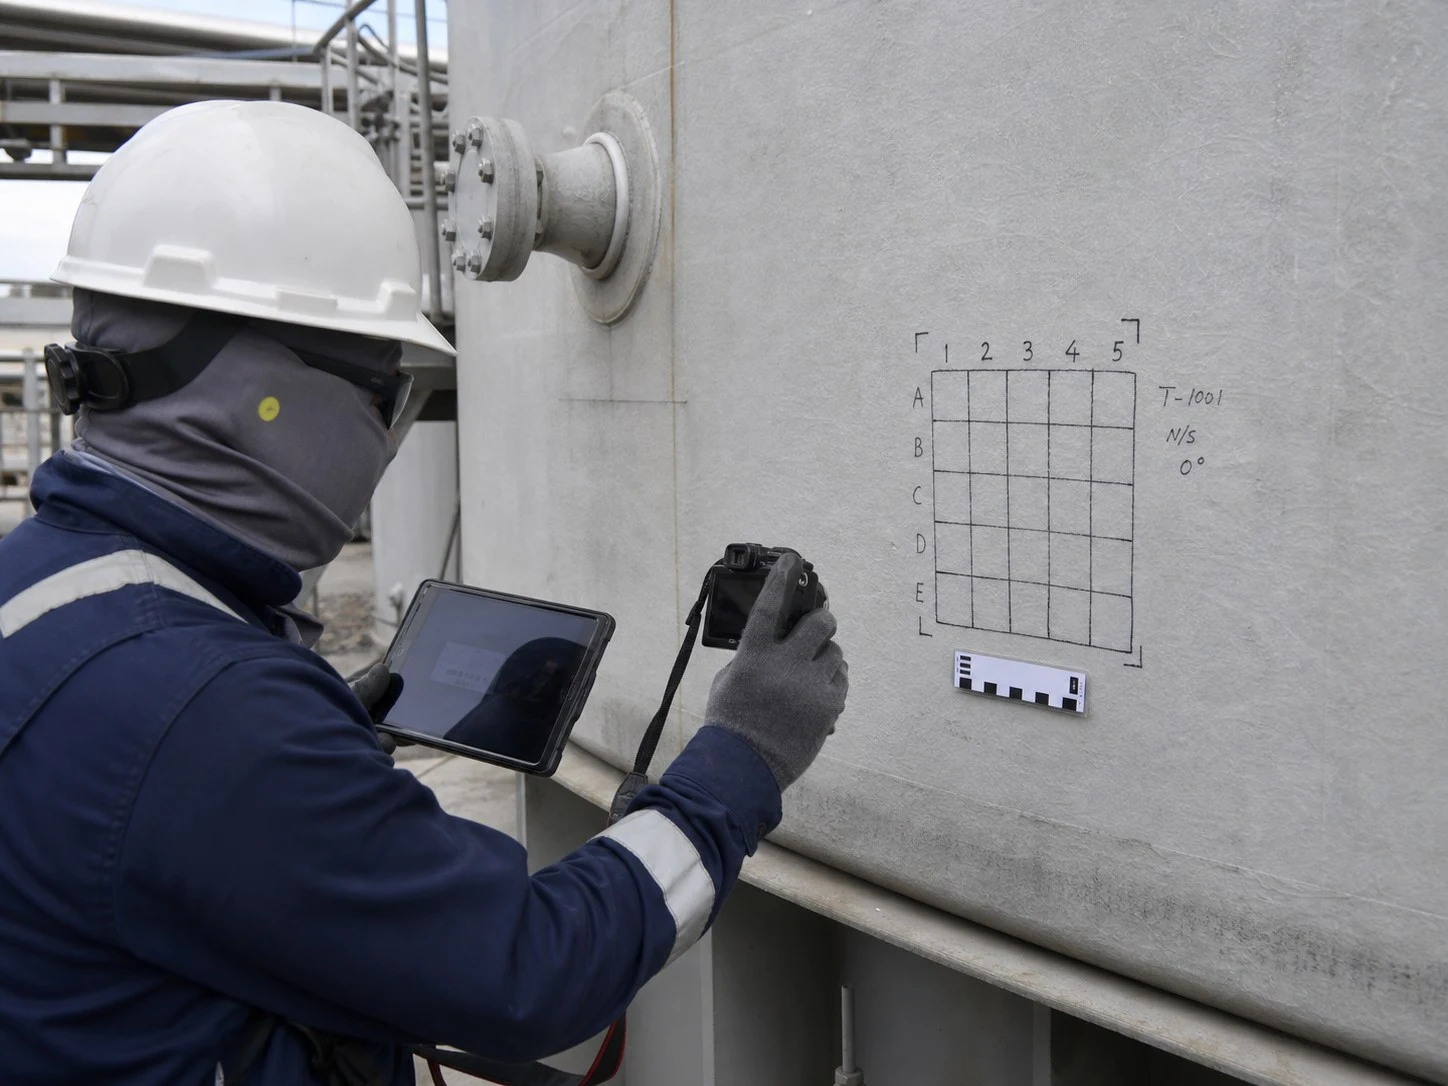
Use this quick checklist during routine external reviews. It does not replace a detailed inspection procedure.
The interval should reflect chemical service, temperature, leakage consequence, age, outdoor exposure, and previous condition. Combine routine operator checks with scheduled detailed inspections. Internal inspection normally needs a planned shutdown and safe-entry procedure.
A structural repair should not normally be designed from the visible outer surface alone. The equipment may need isolation and cleaning so the full crack, laminate condition, and internal corrosion barrier can be assessed. Sealant over an operating leak may hide rather than solve the problem.
Colour fading or light weathering may be cosmetic, but depth cannot always be judged visually. Exposed fibres, soft areas, distinct cracks, leakage, bulging, or delamination need further evaluation. Compare the area with sound laminate and earlier records.
Composite laminates behave differently from homogeneous metal, so conventional steel thickness readings may not provide a complete assessment. Specialist techniques, calibration, and interpretation may be required. Visual inspection, history, targeted testing, and engineering review are often combined.
The original cause may remain: vibration, pipe movement, poor support, flange misalignment, chemical contamination, unsuitable repair resin, insufficient preparation, or incomplete removal of damaged laminate.
Not every blister carries the same risk, but each should be recorded and assessed. Location, number, size, depth, growth, service conditions, and effect on the corrosion barrier determine the response. Widespread or changing blistering needs specialist review.
FRP tanks and pipes can provide dependable service in corrosive industrial environments, but they still need organised inspection and maintenance. Combine visual checks, operating-history review, support and nozzle inspection, planned internal examination, accurate records, and early specialist assessment. Repair only after the complete damage and its cause are understood.
Busubait’s portfolio includes fiberglass tanks, chemical-storage tanks, process equipment, pipe spools, fittings, linings, and custom FRP products. If a defect may need monitoring, repair, or replacement, the team can review the service conditions and discuss a suitable fabrication or repair approach.
Speak With the Busubait Team